
Easy DIY Holiday Cards with Cricut Maker
Hello Cricut lovers! The snow is flying up north and cooks across the country are prepping their Thanksgiving turkey menus, so that must mean it is time to talk DIY Holiday Cards!
[Disclosure: This is a sponsored post written on behalf of Cricut, but all opinions expressed are my own.]
Today, I'm bringing you two clean and simple DIY holiday card designs that, with the help of Cricut Maker and a few of my favorite Cricut tools, will make easy work of your handmade holiday cards without sacrificing creativity or style!

Cricut Merry Christmas house card
Supplies Needed:
1/16" Basswood
sandpaper (optional)
patterned paper
masking tape
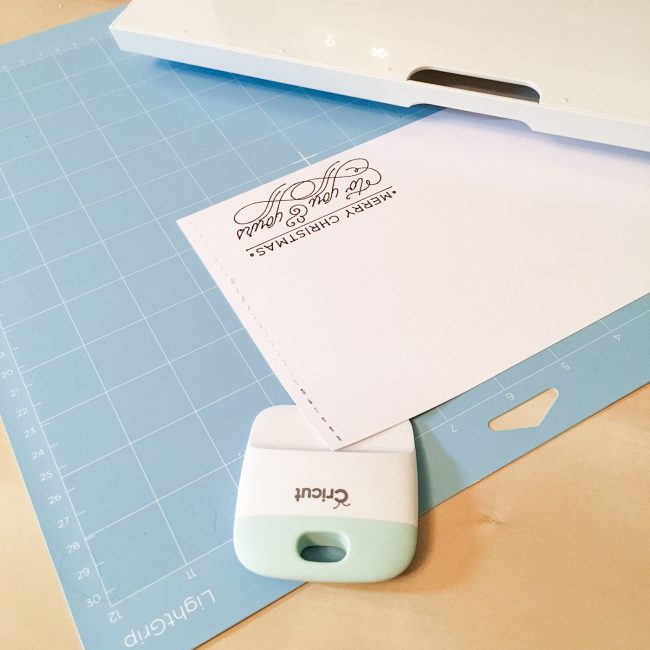
The first step to making this handmade holiday card is to cut all of the pieces out on your Cricut Maker machine. The card base requires the use of both a Cricut pen and the single Scoring Wheel.

Creating Card Base on Cricut Maker
When you peel the card base off of the mat, some of the waste from those tiny faux stitching spots will cling in the holes. That just happens when a cut is so tiny. The piercer from the Cricut Papercrafting Tool Set is the perfect solution for getting rid of these hangers-on! Just use its tiny point to poke the pieces that need to be removed, and they will pop right out!
Using Cricut Scraper Tool
This homemade holiday card can be infinitely customized to create different looks using different cardstock and patterned papers...and it's a great way to use up your scraps!

DIY Holiday Cards with Cricut Maker
Using the knife blade to cut basswood is simple if you remember a few simple things. It will cut up to 3/32" thick, and your cuts can't be smaller than 1/2" in size. (That includes interior cuts in your shapes.)
To do the actual cutting, tape your basswood down to a purple (Strong Grip) Cricut cutting mat with masking tape. Make sure it is in the upper left hand corner of the measurement grid, but not outside it. See those little white wheels spread along the middle area of the steel roller bars? Slide those white wheels to the right so they are outside of the area where your basswood will pass under. Then you can load your Cricut Knife Blade in the adaptive tool system, and follow the on screen prompts in Cricut Design Space to select your material and load the mat into the machine.

Cutting Wood Veneer with Cricut Maker
After you have completed cutting all of your pieces, you should have all of these elements, ready to assemble your homemade holiday card! Layer your house together, and adhere it to the front of your card. Your DIY holiday card is complete!

DIY Holiday Card pieces
Mid-century modern, and the pastel Christmas that goes with it, is very trendy. The same techniques and Cricut tools that I used to make that cute country Christmas card above can be used to bring a taste of retro mid-century to your Christmas cards.

Retro DIY Holiday Cards with Cricut
Supplies Needed:
1/16" Basswood
masking tape
sandpaper (optional)
Plaid FolkArt "Gypsy Rose" Pickle Wash (or pink acrylic paint
patterned paper
(If you like the design but aren't a fan of pastel Christmas, try making this DIY holiday card with a dark background, and dark green or silver trees for a midnight on Christmas Eve look.)
To make this card, first cut out all of the elements of the handmade holiday card design using your Cricut Maker machine and the project file. (Follow the instructions above on how to cut out the wood tree from basswood for the left side of the card.)
Once all of the elements are cut out, paint the wooden tree with Plaid FolkArt Pickle Wash following the instructions on the bottle. (I chose that particular paint because it allows the grain of the wood to show through, so the person receiving your DIY holiday card can see that the tree is actually wood!)

Painting wood veneer for DIY Holiday Cards
While your paint dries, grab the Distresser tool from the Cricut Papercrafting Tool Set and get to work rubbing it along the edges of the tree with the sentiment on it! Distressing that edge gives it more dimension, and adds interest to that tree so that it can hold its own in the design with the other two elements.

distressed edge on diy holiday card
Once all of your elements are prepared, you can quickly assemble them.
Cutting the stars out of the Cricut Adhesive Foil means that these small items are easy to adhere. (Plus the foil cuts so beautifully at these miniature sizes!) The paper piercer from the Cricut Papercrafting Tool Set is your secret shortcut for getting perfect placement of tiny sticky items like this! No more getting them stuck to your fingers, or to each other... just pop the end of the piercer under them and use it as a tiny wand to lay them down with! Place them, put your finger on top to hold them in place, and slip the piercer out from underneath. (Do this carefully, because it is a piercer, after all!) Then just press and rub firmly to make sure the foil adheres well!
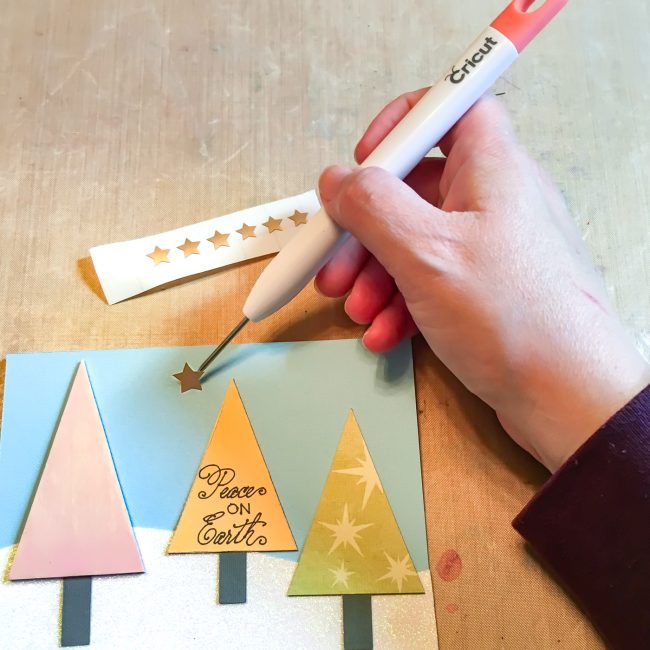
Cricut paper piercer
I can't wait to see how you all customize these DIY holiday cards for your family and friends! Tag me at @scrapbookupdate on Instagram to share yours!
This is a sponsored conversation written by me on behalf of Cricut. The opinions and text are all mine.