T-Shirt Fun with Cricut Easy Press 2!
I hate ironing. Really, who doesn't? And because of that, I rarely use Iron-On despite my love of all the cool things that can be done with it. Wrestling with the setting up the ironing board, playing defense against rampaging kids and cats for what seemed like forever until the iron was ready to use...and then the trial and error of trying to get the temperature and time right.
Those days are behind me, because that was before I met Cricut Easy Press 2!
[Disclosure: This is a sponsored conversation written by me on behalf of Cricut, but all opinions are my own.]
Scrappy Mom T-Shirt with Cricut Easy Press 2
Now, I want to Iron-on ALL THE THINGS!
And with the new Cricut Strongbond™ Guarantee, I can - because Cricut guarantees that if Cricut Strongbond™ Iron-On is used as directed, I'll be satisfied or they'll replace it for free! It's designed to last 50 wash and dry cycles!
My Cricut Easy Press 2 is the 9x9 size, but it's also available in 6x7 and 12x10 sizes. When I first read the instructions I was skeptical that it could really complete an iron-on in around a minute. It seemed too good to be true. But I was stunned to discover that in fact, yes, even clutzy me really can finish an iron-on that fast with the Easy Press 2! It's unbelievable how quickly the Easy Press 2 heats up, and once it does, an iron-on can be applied in only a few seconds.
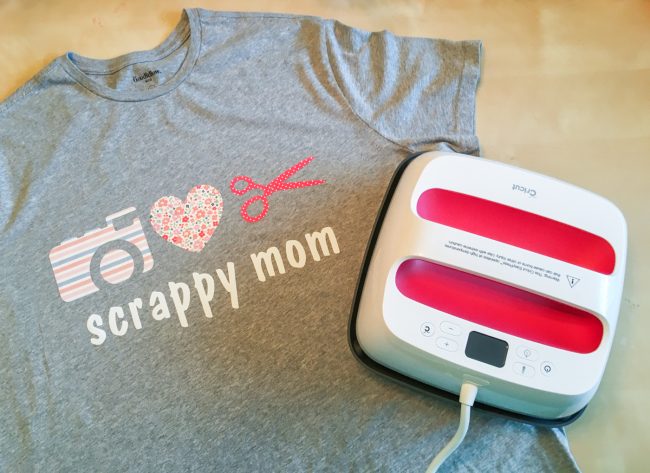
Here's a closer look at the logo I created on my t-shirt:
Scrappy Mom T-Shirt Design
Supplies Used:
Grey Men's XXL T-Shirt
My file in Cricut Design Space (click here) is sized for a Men's XXL t-shirt. For smaller shirt sizes, you may need to adjust the size of the design by resizing the group.
Cricut Design Space Scrappy T-Shirt
The patterned elements are made with Cricut Martha Stewart Patterned Iron-On in Wildflower. These coordinating designs are so pretty! I can't wait to make more projects with the leftovers from my package!
Cricut Martha Stewart Patterned Iron-On
The patterned iron-on has a texture something like a super lightweight canvas. It cut like absolute butter with my regular blade and on the same Light Grip Cutting Mat that I usually use for iron-on.
Cricut Maker cutting Patterned Iron-On
I always use my Cricut Basic Tool Set to work with iron-on and vinyl...the weeding tool is an absolute must for getting out the small inner pieces like the inside of these scissor handles!
Weeding Cricut Patterned Iron-On
The best part about using my Cricut Easy Press 2 is that I could do all of this right in my craft room! My Cricut Easy Press 2 sat in its Safety Base right on my regular craft table while it heated. Then I used the Cricut Easy Press Mat to protect my table while I did the iron-on application to my shirt.
Cricut Easy Press 2
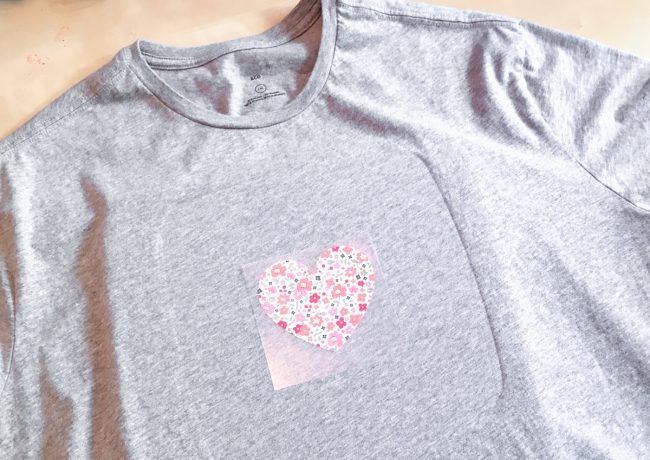
I started my design by placing the center element (the heart) and pressing it in place following the instructions for my Cricut Easy Press 2. With the Cricut Easy Press Quick Reference Guide, I knew exactly what temperature to set my Easy Press 2 at, and how long to press my iron-on. And using the machine's timer, I couldn't get the time wrong!
Cricut Easy Press 2 project in progress
Once I had the heart correctly in place, it was easy to build my other design elements around it! The text element was slightly wider than my Cricut Easy Press 2, so I started pressing in the center and worked out to the edges.
Using the Cricut Easy Press 2
In only a few minutes of pressing, I was done! Thanks to the ceramic coated heat plate on the Cricut Easy Press 2, it was easy to get perfect (and secure) application. I look forward to wearing and enjoying this shirt for a long time!
Scrappy Mom T-Shirt with Cricut Easy Press 2
What could you do with the quick and easy iron-on capability of the Cricut Easy Press 2?
This is a sponsored conversation written by me on behalf of Cricut. The opinions and text are all mine.


