Back to School with Cricut Scoring Wheel!
It's time to think about back to school time already! With Cricut Scoring Wheel, it's easy to welcome teacher back from summer vacation with a cute gift!
[Disclosure: This is a sponsored post on behalf of Cricut, but all opinions are the author's own.]
Cricut Scoring Wheel teacher gift
The new Cricut Scoring Wheel makes it easy to make 3D items like this adorable schoolhouse box, with your Cricut Maker machine. Pair it with a small plant and a gift card holder and it makes for the perfect back to school gift for teacher!
Supplies Needed:
patterned paper (12" x 12" sheet or scraps)
ribbon
paper straw
Cricut Scoring Wheel
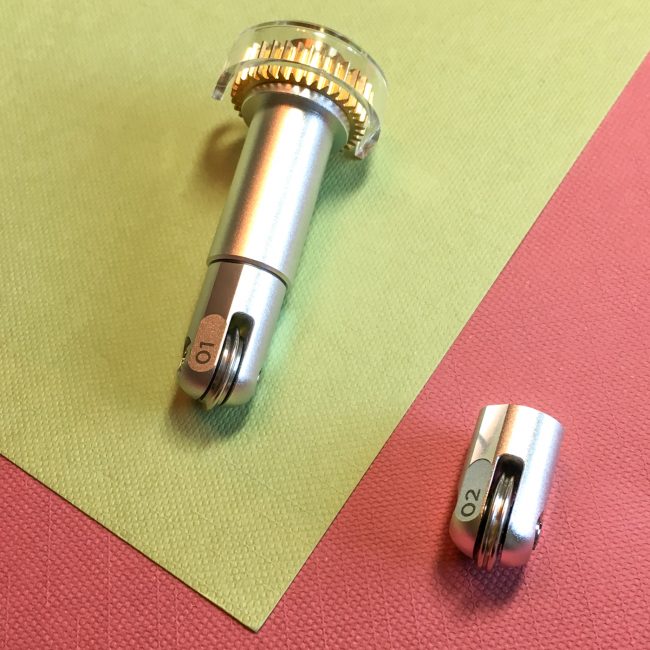
If you've liked the scoring stylus, you'll love the Cricut Scoring Wheel! Because it only works in the Adaptive Tool System on the Cricut Maker, the Cricut Scoring Wheel has up to 10x the pressure of the stylus. This means you get cleaner and easier folds (and with the double scoring wheel, folds on heavier material). My cardstock folds like butter with the Scoring Wheel...no more need to finesse the fold to make sure I get it right! If you do anything involving paper and folding with your Cricut Maker machine - you absolutely need this accessory!
Cricut Scoring Wheel
Starting to use the Cricut Scoring Wheel is really easy. When you start to make your projects on Cricut Maker now, you have the option to select Scoring Wheel (the default) or the Scoring Stylus. Then insert your Scoring Wheel into the Adaptive Tool holder when instructed to by Cricut Design Space during the cut process.
tool selection Cricut Scoring Wheel
Oh, and if you accidentally insert your rotary cutting wheel instead of the scoring wheel when your Maker machine asks for the scoring wheel...your Maker will prompt you to insert the correct tool. (Let's not discuss how I know this, ok? Sometimes it's good that our machines are smarter than we are.)
Cricut Scoring Wheel
I highly recommend for sharp angles like the one that I'm lifting below to use the spatula from the Cricut Tools - Basic Set or one of the other Cricut Tool Sets. These spots are very prone to tearing if you just try to remove them with your fingers from the mat. The spatula pops them up gently from below without stressing the joining point in the paper.
Cricut Tools
Before making your folds to assemble your box, I recommend gluing together the layers of the design. This is much easier to do when the box is still flat! (Look how nice and pronounced those score lines are below! Instant, perfect folds!)
Back to School Scoring Wheel
Small items like this gift card holder that have a lot of folds can be difficult to get together smoothly if the folds aren't perfect. I've honestly never had one go together as easily and as perfectly as this one created with my new Scoring Wheel. The folds were perfect and crisp, so everything lined up just right for a beautiful assembly.
I put different patterned papers on the inside and outside of the gift card holder. It's a great way to use up some patterned paper scraps!
Gift Card Holder with Cricut Scoring Wheel
Tie the gift card holder up with ribbon and it is done! I taped mine to a paper straw to "stake" it into my plant.
If you don't want to give teacher a plant, how about filling your schoolhouse with pencils, dry erase markers, and other classroom necessities?
Back to School with Cricut Scoring Wheel
What will you make with a Cricut Scoring Wheel on your Cricut Maker?
This is a sponsored conversation written by me on behalf of Cricut. The opinions and text are all mine.


