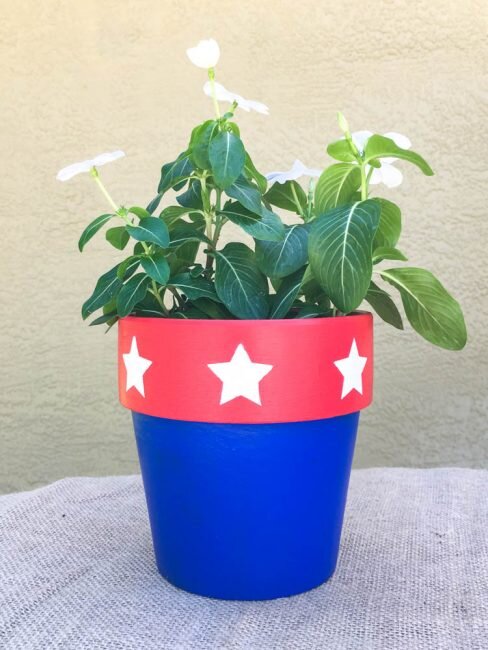
Paint a Patriotic Flower Pot for the Porch!
I'm so excited to be sharing my patriotic flower pot project today to help kick off the annual Red, White & Blue series at Sugar Bee Crafts, which is being run as a sort of month long blog hop this year! I look forward to seeing what all the other talented bloggers who are taking part will contribute.
[Disclosure: This site is a participant in the Amazon.com affiliate program. Some links in this article are affiliate links which pay a commission if a purchase is made after a click. I am part of blogger programs at Cricut and Plaid, who each provided me some products used in this article.]
Supplies Needed:
Quart Succulent Clay Pot (available at local home centers)
Cricut Explore Air 2 Machine [Amazon.com, Cricut.com]
Cricut Stencil Vinyl [Amazon.com, Cricut.com]
To start my patriotic flower pot, I used the white paint and a foam paintbrush to put two coats on the rim of the pot.
While my white paint was drying, I used my Cricut Explore Air 2 machine to cut out five stars from Cricut stencil vinyl. I used the Cricut Design Space basic shape tool to do this, and sized the stars so they would fit nicely on the rim of the pot.
Once the paint was dry on the rim of my patriotic flower pot, I stuck down the stars, I used a tape measure to get them evenly spaced around the rim. I measured the rim, divided it by 5 to get the spacing. I then stuck down a star, and measured from the left side of it to get to the starting point for the next star. I made sure to rub the stars down really firmly, especially at the edges, to avoid paint seeping under the edge.
The next step once the stars were in place was to paint over the white with the Apple Red paint. While I had only put the white on the exterior of the pot, I carried the red over the rim down a distance into the interior of the pot so that the pot would be red above the soil line. This detail helps make the pot look "finished" no matter what angle it is viewed from.
It took three coats of paint for me to get solid color coverage over the bright white color. Remember when brushing your paint on to brush out from the center of the star masks so you aren't pushing paint under the edges of them! (If you do find paint under the masks when you remove them, the areas can be touched up with a small brush and the white paint.) Once the red paint was dry, I peeled off the star masks and my white stars were showing through the red paint!
To finish my patriotic flower pot, I used painter's masking tape to tape around the bottom of the red rim of the pot. Then I painted the bottom of the flower pot in two coats of cobalt blue, and removed the painter's tape.
Once all of my paint was dry, I added a few cute annual flowers that I bought at the local garden center. My patriotic flower pot was ready to beautify the table on my back porch. Now, if only I can remember to water my poor flowers regularly!
Would you like to see more fun patriotic crafts? Visit the Red, White & Blue series at Sugar Bee Crafts, or my Easy Melt & Pour Patriotic Soap!


