See My Craft Room Makeover Reveal!
It seems that reorganizing the craft room is a constant state of being around here. It was just three years ago that I unveiled the last makeover of my craft room. Now I'm back to show off the recently finished new version, which has been well over a year in the making!
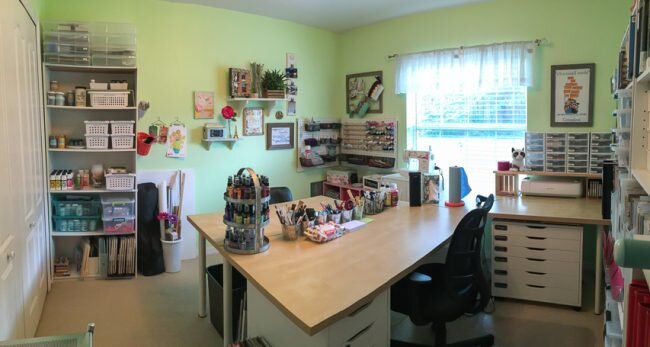
My revamped craft room has two full-sized workspaces in it, to accommodate guests and family members. It is also fully zoned, with areas set aside for sewing, painting supplies, scrapbooking, and general crafts, instead of everything mixed together like in the previous arrangement.
Much of the furniture and storage items in the room was repurposed from the previous version of the room, or from other areas of the house. A large portion of the furniture is either from Ikea, such as the tables and chests of drawers, or Ikea has similar pieces available. There's also huge quantities of Sterilite storage in the room - baskets and boxes, mostly. While it's nice to have a pretty workspace, above all my priorities are practical and affordable when assembling my studio.
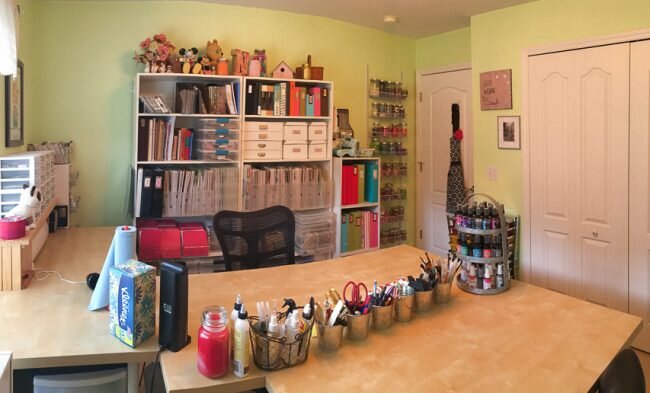
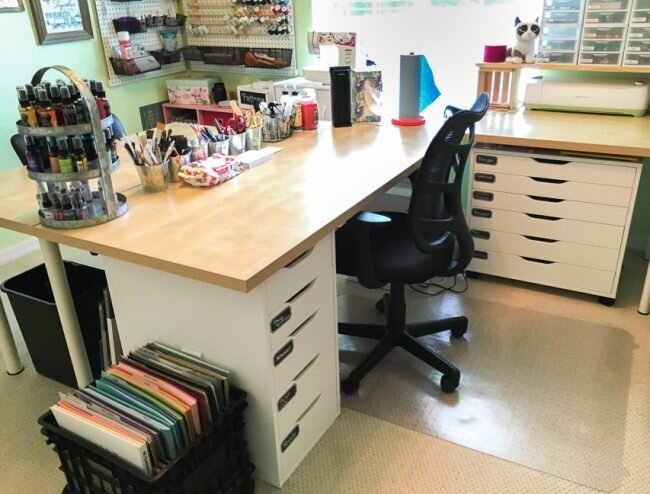
The largest dedicated area is for my scrapbooking. The larger workspace right inside the door of the room is devoted to my scrapbooking and papercrafting activities. The desk is an Ikea table, with two Alex drawer units underneath it. there's also a rolling file crate that I use to hold my solid cardstock.
Across the center of the table are buckets that hold my basic tools, such as scissors, paintbrushes, and pens & pencils. The buckets came from the Target dollar spot years ago. Each bucket holds a different type of item. Having them in the center of the table makes them usable from both sides of the table. I also keep a pack of baby wipes, a stack of blank index cards, and some post-it notes on the table as well - items that I use frequently while I work.
Also on the center of the table, at the end, is this three tiered stand that I picked up at Ross. It holds my spray inks so they are accessible from both sides of the table. One of the reasons for adding the second seat in the studio is that my husband occasionally joins me to make an art journal page or a tag. These sprays are an item that he frequently will use, so having them out is convenient for us both.
Also on the tabletop, over to the right when you are seated at the main desk, is my Cricut work station! I used two small wood crates from Michael's and put a plank over them to create something resembling a monitor stand that my Cricut machine can slide under to save desk space. The small crates are the perfect size to store my Sizzix Bigz dies, so the crates are useful as storage as well as support for the shelf.
My Cricut stays plugged in, so to use it all I have to do is slide it out and turn it on! I find that if I make tools have too much set up, I don't use them. For this same reason, I also leave my heat gun plugged in and sitting on the table, ready to go.
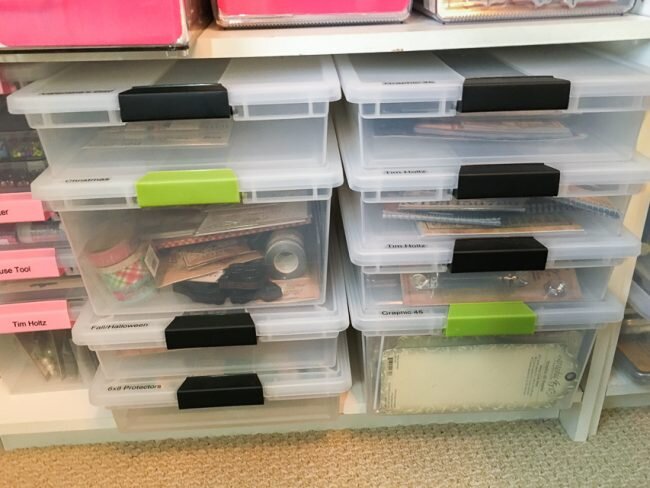
On the shelf above my Cricut, I stacked a bunch of small Sterilite drawer units that hold all sorts of color media such as pens, watercolors, Gelatos, and such. All the drawers are labeled in color coded labels so I know what is in them, and arranged in zones so like items are together. The drawers are designed with a stopper at the back to prevent them from being easily pulled all the way out, but I used a strong pair of scissors to cut it off of all the drawers. This allows them to be pulled out and placed on the table so I can work with the contents.
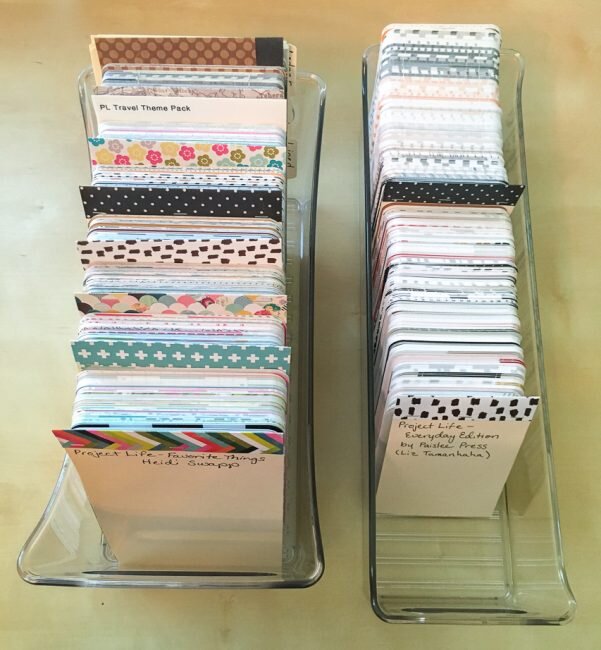
Tucked in the corner next to the drawer units are some stacking closet shelves that are now my Project Life storage (among other things). Keeping the cards in bins means that they can be pulled out on to the table to be used.
My 4x6 Project Life cards are stored in Interdesign Condiment Caddies, organized by index card dividers that have been modified by cutting the tab off and then sacrificing a card from the kit to staple over the end to make a new tab. The Condiment Caddy will hold 4x6 cards from about 6-7 core kits.
The 3x4 Project Life cards are stored in an Interdesign 4x4x14.5 Fridge Bins similar to this one. I cut 4x6 index card dividers in half to create the dividers, and customized them for each kit for easy reference by cutting up a card from the kit. Each 14.5" bin will hold the 3x4 cards from two core kits, plus some extra mini kits or accessory card packs.
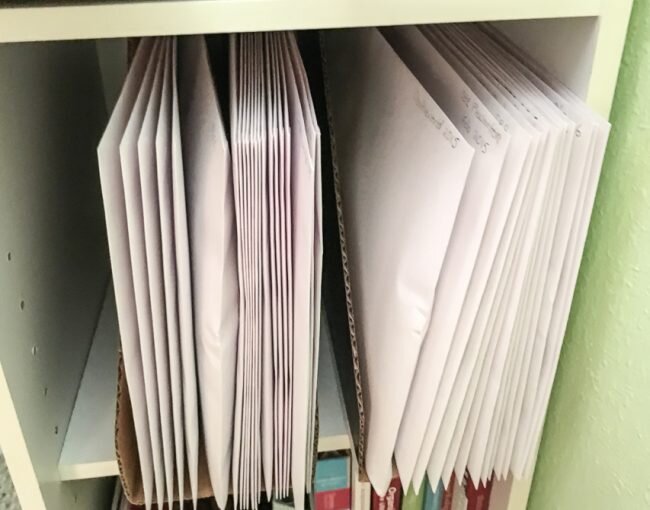
On one of the shelves underneath the Project Life cards, there are magazine holders turned on their sides. In them I put large envelopes with paper memorabilia (such as tickets and brochures) from big events, so that it is easily accessible to scrapbook. I write in pencil on the envelopes so that they can be recycled for a new event when I finish the one they currently contain.
Underneath the table that holds my Cricut is the rolling Ikea Alex drawer cart. Tucked on top of it are my paper trimmer, and glass cutting mat, out of sight but easy to grab to use.
The drawers of the cart contain my most frequently used small items, mostly ink pads and my 28 Lilac Lane embellishments.
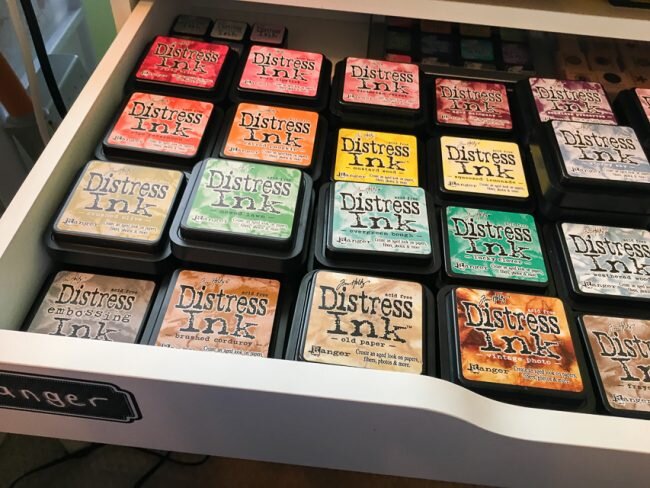
My inkpads are arranged in drawers by company and type of ink. The top drawer holds all of my Distress ink, arranged in a stacked rainbow of color so I always know right where to find the one that I need.
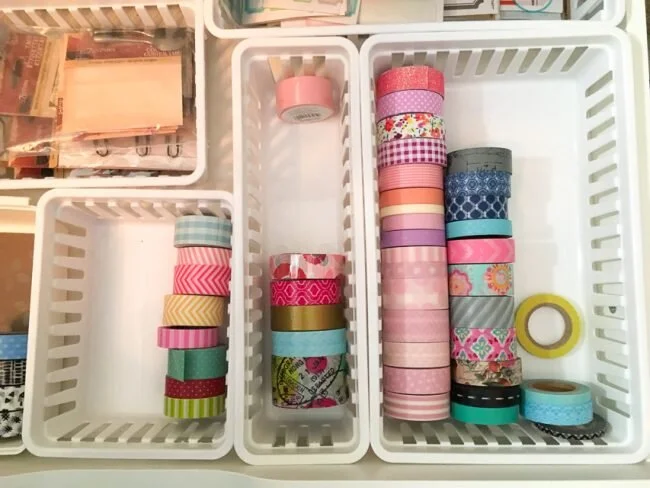
I'm very fond of using drawer organizing baskets in my drawers. These ones are by Mainstays - a Walmart house brand) and are very affordable. Which is a good thing since I buy them in huge quantities!
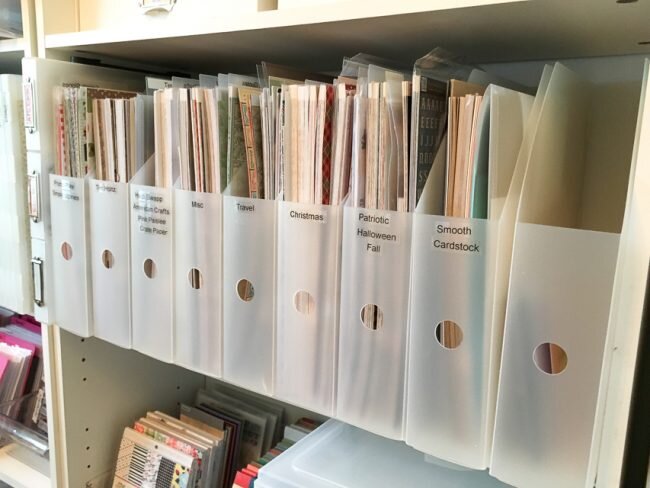
If I spin my desk chair around, I can easily reach everything that is on the shelves that are behind me when I'm sitting at the desk. All of my patterned paper is on the shelves that are exactly at eye level, in vertical paper holders. My paper is organized partially by company, and partially by special categories such as holidays. I find that this method works the best for me for how I am usually looking for paper.
Also on the shelves are loads of plastic latch storage boxes from Sterilite (and a few shoebox sized ones from Hefty). I like storing my supplies in boxes like these because they are easy to repurpose as my needs change. All I have to do is just slap a new label on them! The other nice thing about using boxes is that they can be taken off of the shelf and moved to my work surface to look through very easily.
Some of my boxes contain types of supplies or tools - such as twine - and some are devoted to containing embellishments from certain companies or for certain holidays.
A lot of my craft storage used to be in modular cubes. A few of the ones I have are still in my craft room, creating a tower that is a combination of album storage and die cutting station.
This die cutting station holds my Sizzix Big Shot machine and its various cutting accessories, as well as a few large dies. The metal rack is actually a metal vertical file sorter. It works perfectly for this application and fits exactly in the spot that I have for it. It often pays to think outside of "craft" when you are trying to organize!
Speaking of thinking outside of craft for my organizing, right next to my die cut station is my button storage rack! Since I'm the social media and blog manager for Buttons Galore, this means I have a lot of buttons in my studio. This Closetmaid wall and door rack, designed to store canned goods and other items in a kitchen or pantry, is the perfect way to store mason jars full of buttons!
On the other side of the door sits a rolling cart that I originally bought 6 years ago for my short-lived kitchen scrap space. After that, it lived in my daughter's room for awhile. Now it is back in my craft room to hold my wood mounted rubber stamps. The shallow drawers are the perfect depth for the stamps. I wish it was a color that didn't stick out so much (like plain white) but once again, form loses to the all-important function in my space.
On the other side of the window from my scrapbooking space is my new sewing area! This cube unit has lived in my craft room for a very long time after leaving my daughter's room awhile ago. The pink bins hold various different fabrics and my active projects. The grey chevron cases are for fat quarters. Mine came from Joann.com and appears to be discontinued, but similar ones are also available at Amazon. The decorative boxes hold various notions like bias tape.
Next to the pink unit, on its right, sits a white cupboard that holds more fabric and my sewing machine. The machine, which was previously in the closet, sits here all plugged in and ready to use. All I have to do now to use it is pick it up and move it onto the table top, and then I am ready to sew!
I am very careful about not wasting an space that could be storage in my studio. So the dead space under the end of the table has another small plastic drawer unit tucked into it. This drawer unit holds interfacing, small pieces of batting, and fiberfill.
The pegboard existed in the previous version of my studio, but it was installed to store scrapbook items. (Click here for the how to of making and installing it.) Now, it is repurposed to store sewing items, and is working out much better for me in that application. I used small pegboard hooks to hang two June Tailor thread holders on the board, which gives me storage for 120 spools of thread. The rest of the board is covered in the same bins I was previously using, only now they hold things like containers of pins, scissors and rotary cutters, measuring tapes, and other sewing notions.
Next to the closet is a bookcase that holds all of my Plaid paints, along with my stencils and a few other paint related items. On top of the bookcase are some Iris project boxes that contain my "current" scrapbooking projects in progress.
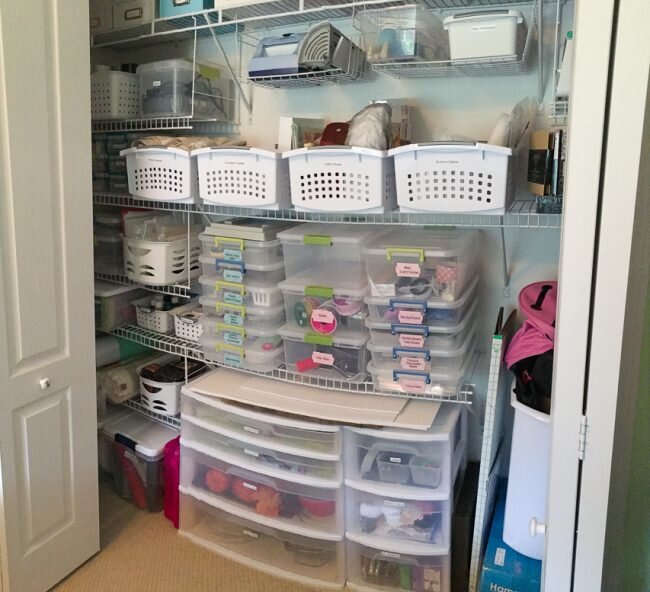
The closet is what I consider my "general crafts" space - everything that isn't scrapbooking or sewing or Plaid paint related. The big white baskets hold supplies and products for projects for each of the three websites I currently blog for (Scrapbook Update, Buttons Galore, and this one).
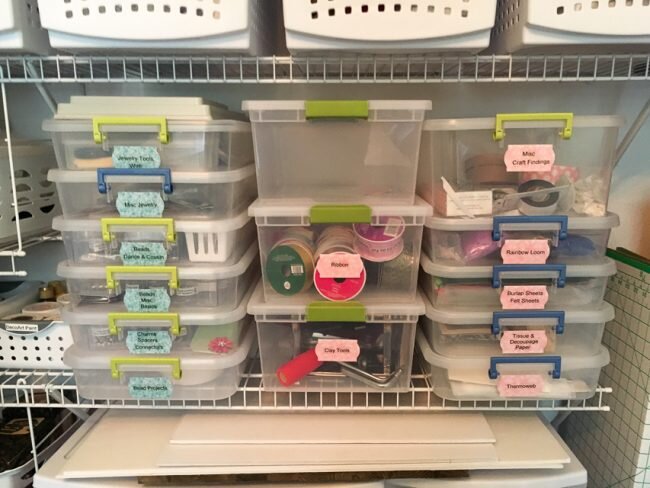
This stack of Sterilite latch boxes has been the heart of my craft closet storage for a long time. What is in the boxes has changed over time along with my craft activities, but the boxes remain a reliable and convenient way to store my supplies.
The large drawer unit on the left has been in my craft room for a long time, but in different form. It originally was a five drawer unit! If you look closely at these Sterilite drawer units, they are modular! You can snap out a level of the drawers to make your unit smaller! By doing that, I was able to fit the unit in the closet, and it is the same height as the small 3 drawer unit I purchased.
Putting the two drawer units in the closet created a narrow "shelf" on top of them that I was able to use to store my sheets of foam core that I shoot project photos. I also have photo props stored in the bottom two drawers of the large drawer unit.
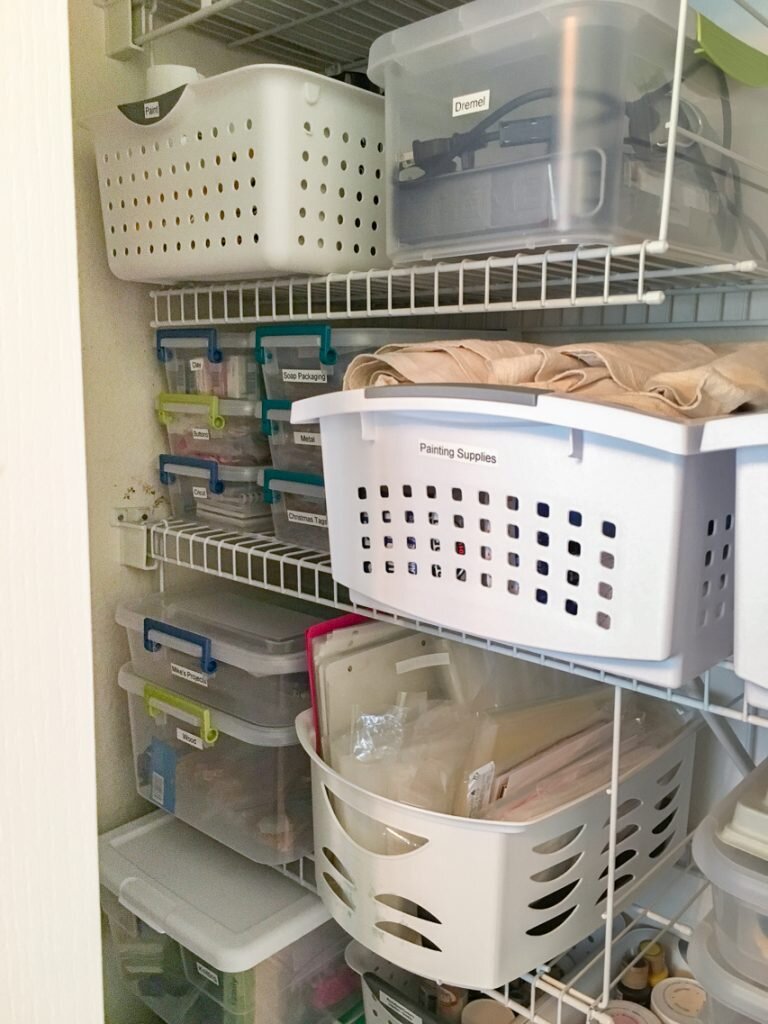
The closet is arranged so the items are stored in the center if they are frequently used and up high or off to the sides if they are less frequently used. These items off to the side - like my Dremel tool and clay - are less frequently used but I still need them around!
Although I tried to be very strict about keeping items in their own "zone", certain space limitations did cause me to have to violate that rule a tiny bit. On one bottom shelf of the closet, I have a few scrapbooking products stored, as well as some large fabric items like batting, foam and interfacing that won't fold up to go into smaller storage.
Thanks for touring my craft room with me! I'll be sharing more of the details in features the rest of the week, so if you have a question be sure to leave it in the comments so I can answer it the upcoming articles!

