
Organized Crafting With Dymo Labelmanager 160 [Sponsored]
[This post was sponsored by Dymo, but the content is solely the author's opinion.]
Anyone who reads me regularly knows that I am, well, a tad bit obsessed with organizing. Especially when it comes to my craft supplies.
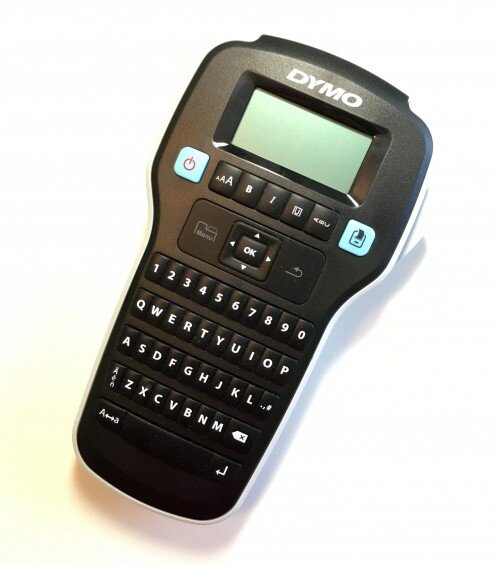
Dymo Labelmanager 160
I've been in the midst of a long process (over a year) of completely reimagining my craft space from top to bottom. I'll share the results soon but in the meantime, I want to share with you one of the tools that has been important in the final stage of my organizing process.
I've been a fan of labeling for awhile, but had gotten really fed up with the one that I was using due to its limitations and the cost of using it. As I was about to chuck it, I received an offer from Dymo to try out their Dymo Labelmanager 160 (pictured above). Since I was already a fan of using labels, I couldn't have imagined how it would broaden my usage of labels!
Before we get to how I've used it, I want to tell you what features I like about this particular label maker so much.
Form Factor: The Dymo Labelmanager 160 has a shape that makes it easy to hold with small (meaning female) hands. The form factor means that the QWERTY keyboard can be typed efficiently with two thumbs, an easy task for any experienced texter.
Cost: The Dymo Labelmanager 160 is way more affordable to use than a competitor model I had previously tried. The tape cartridges are cheaper and there is less waste produced on the ends of labels when printing.
Tapes: Tape is easy to find for the Labelmanager 160 in the small town I live in - the basic black print on white tape is carried at Walmart, a major convenience. But beyond that, Dymo offers a large selection of colors of tape and printing that can create a variety of different effects for different uses. It's easy to switch cartridges in and out of the machine, so there's no need to commit to using a single style of tape for projects.
Besides the selection and cost, I also like the body or weight of this tape. As long as the label isn't overly long, it will maintain its stiffness while you are working with it to apply it. It makes it much easier to apply the tape smoothly and exactly in the position you want without errors.
Fonts & Characters: A huge library of special characters is available with the push of a button on the Labelmanager 160, making it easy to use symbols and punctuation on my labels. But one of my most favorite features of this label maker is that it gives me granular control over the font size you print in - there's 6 different font sizes between 8 point and 24 point to choose from. In addition, it's easy to create bold, italic, underlined, and vertical text with just a press of a button.
So, what have I been able to do with all of this functionality? Well, let's start with the basic black on white label tape that comes standard with the Dymo Labelmanager 160.
I'm a huge fan of using plastic containers in my craft organizing - my space is full of them. But the problem with plastic containers is that it can be hard to know exactly what is inside of them, especially if you tend to change the order they are stacked in frequently.

Project Boxes unlabeled
A few quick labels make my boxes for storing my projects in progress easy to tell apart, and the white tape with the black labels is easy to see from my desk part way across the room. The simple labels are also quick and easy to replace when I finish a project and start another one, changing out what is in the box.

Project Boxes labeled
The white tape also comes in handy on these drawers, which are quite see through but not quite enough to show exactly what is in the drawer. The white tape makes the text on the label stand out.

needlearts drawers labeled
In a drawer containing my cross stitch supplies, the white tape stands out nice and bold from the colorful background of floss behind it. As these supply categories grow, I'll be able to add extra detail to these labels (such as separating my cross stitch floss drawer from my patterns and fabric drawer).

Cross Stitch Drawer close up
The two line text feature of the Dymo Labelmanager 160 allows me to label my stamps and my dies with nice detailed labels that make creating supply lists easy for my layouts. But on the dividers you can see another one of my favorite ways to use this machine: with the clear tape! These home made plastic dividers look very professional with labels printed for them on the clear Dymo Labelmanager tape.

Stamp Storage labeling
Below, the project of labeling my paper holders was in progress. Without the labels and with the paper standing on edge, it's hard to tell what is in them from my seat at my desk. With the clear labels, the labels are easily readable from my seat only inches away but aren't garish.

Paper Holder labeling in progress
The clear labels also work great for my small vertical files, which I keep turned around with no contents visible so without the labels there is no way to tell what is in them!

Labeled Paper holders
But the clear labels don't just have to be used by themselves. Adding them to a colored background gives them a whole new versatility. For my stacking supply boxes in my closet, I've used my Cricut Explore Machine with printable vinyl to create labels. Then I used clear label tape to create text to put on top of them for a decorative look.
Why not just add the text when I printed the vinyl background? Several reasons. Adding the text later lets me print these labels in large batches and then add the text when I use them. And by using the vinyl, I can use a bit of sticker remover to just peel the label tape off of the decorative background and quickly re-label the bin when its contents change, without having to make another decorative sticker.

Print Cut Labels
I tend to hoard 6"x6" paper pads, and they make a great partner for my clear Dymo label tape! Look how gorgeous these drawer units and boxes look with labels made from an old paper pad and my Dymo Labelmanager 160!
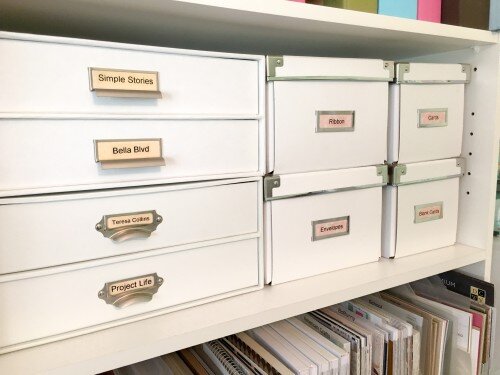
Box labels
It also makes quick & easy work out of creating custom themed labels for my albums, also using my stash of 6x6 paper pads as backgrounds! For instance, a map themed paper with a label on it is perfect for labeling one of my travel albums.

Binder labels
But where the Dymo Labelmanager 160 really starts to shine is creating even more customized labels. For the ones above, I just used the default size of text and threw a clear cartridge into the machine. But for the project shown below, I pushed a few more buttons!
These labels have lived for awhile on my drawers that I use to store my various color mediums. They are made with an alphabet stamp set and some pretty file folder labels. They look nice...but if you look closely, you'll see the problem. Due to the lettering being limited to only a few characters, the labels contain little information. "Tubes" of what? Three drawers say "Cricut" so how do I know what is in each drawer?
This is especially important because I share my craft space with my somewhat creatively minded husband and these are supplies that he occasionally uses. Despite his best attempts, after 25 years together he still can't read my mind to know that the middle drawer holds the blue and green Distress colors. And frankly, occasionally I can't even remember that!

Media Drawers before
But the Dymo Labelmanager 160's ability to set text point size gives me the perfect solution! By choosing the 16 point text size, I was able to print labels that (when trimmed with scissors) I can use to create two line text on my pretty stickers. Now my drawer says "watercolor tubes"!

Media Drawers after close up
The Dymo Labelmanager 160 will, of course, print two line text itself, but it is limited in size to the width of the tape. By choosing a font size and printing it as two separate lines, I was able to print two line text that is wider than the machine's tape - and the perfect height for the drawer labels.
The result are drawers that are labeled in the needed detail - but still readable because I wasn't squeezing my handwriting in the small space. And I was still able to use my fun colored border labels since I used the clear Dymo tape!

Media Drawers labeled
Bonus: If vintage or retro funk is more your style, check out the Dymo Organizer Express Embosser. I'll show it to you more extensively in a future post, but here's a sneak peek!
One area of my craft room, the sewing area, has a lot of black & white chalkboard elements in the decor of it. The Organizer Express with the black embossing tape was the perfect match for it!

Embossing Labeler on bin
When you are organizing, don't forget the details. Labeling may seem like a small thing, but it can make all the difference in the usability of your space. With a tool like the Dymo Labelmanager 160, you can create a practical - and pretty - space easily and affordably.