Tote Bag Project | Pattern Modifications
One of the reasons to sew is to create an item that is exactly what it is you want or need. Even with the large selection of available patterns, you may find yourself not finding one that is quite perfect for what you want to make. No problem...just find one that is close and modify it!
[Disclosure: This site is a participant in the Amazon.com affiliate program. Some links in this article are affiliate links that pay this site a commission when a purchase is made after a click.]
On the pink and blue tote bag project, I sewed exactly to the pattern. But on the larger black and yellow one, I made a few modifications to tweak it to meet my needs exactly. I wanted to maximize the space to use it as a carry-on for an international trip, and add a few features.
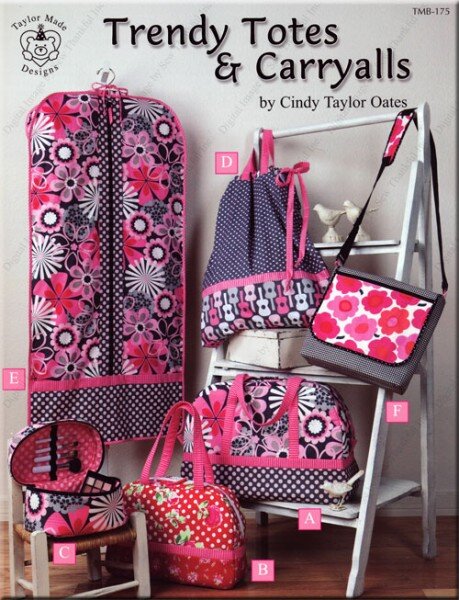
I was working from the pattern "Trendy Totes & Carryalls" by Cindy Taylor Oates (available via Cindy’s website, or on Amazon.com). I purchased it at my local quilt shop where I live, called Cut Up & Sew.
Eagle-eyed readers comparing the finished project with sample A on the pattern cover will notice an immediate difference - the pocket that I added on the outside on one side, between the straps.
The straps provided the perfect anchor point for the pocket. Above, I laid out all of the pieces to check the size before I sewed every thing down. I made the pocket of a double layer of cotton quilt fabric. The top of it is bound together with seam binding. I put it in place under the straps before they were sewn down, and then the side trim piece was attached over the bottom of the pocket as well.
It was a quick and easy way to add a slim pocket that is perfect for throwing a phone or a boarding pass into.
The next modification I made was to the side trim piece. Remember when I said in the color choices article that I had trouble with the fabric and color selections because things were showing through the fabric? The seam allowance was showing through from underneath the yellow striped side trim when the trim was folded over on it.
I solved this problem by laying a length of polyester strap material (the same as is inside the bag's straps) underneath the trim fabric before folding it over and sewing it down. This hid the seam allowance from view, and the bulk also gave the trim a nice quilted finish look.
The final modification that I made to the bag was perhaps the biggest impact, but the simplest to do.
The tote bags in this pattern are created from four panel elements that are created and then stitched together. Changing the dimensions of the front and back panels would be very complicated. All of the curves would have to be adjusted and then the change in size would also affect the size panels, which would have to be adjusted as well.
However, modifying the side (or depth) of the bag is a quick and simple exercise. The side is basically made up of two rectangle shaped panels, so modifying the depth is as simple as adding or subtracting the amount that you want to change in the dimensions.
The top piece, where the zipper is installed, is actually made up of two panels. One of the edges is straight on the pattern piece, so I just used my 6x24 ruler to extend the piece by half of the desired amount when cutting. (So if you want to add 5" of depth, add 2.5" to each pattern piece.)
The result is a piece that looks like this after cutting:
The bottom piece of the bag is even easier to modify. There is no pattern piece for it, just instructions calling for the cutting of a rectangle of a certain size. Adding to the dimensions of the piece is a simple exercise.
Don't forget that after you add to the depth of the fabric pieces (for both exterior fabric and lining) that you also need to do the same for the interfacing pieces!
Simple techniques like these make it easy to create a bag that is exactly what you want and need. Like a recipe when you cook, a pattern can be a starting point to create from, not just a rigid set of instructions to follow.
Now, what are you going to modify?


