Books | Stencil Style 101 by Ed Roth
Disclosure: This site participates in the Amazon.com affiliate program.
Wearables are becoming a big category in crafting, and I have been having some fun experimenting with them lately, so I was really excited to check out Stencil Style 101 by Ed Roth. What I found was a book that was fun, useful, instructive, and inspiring - a great combination.
Stencil Style 101 is a compilation of fashion projects that are built around a series of more than 20 stencils that are included in the back of the book. The stencils are perforated for easy removal and when you are done, there is a pocket to hold them for future use (a nice detail). Each project features a different technique for working with the stencils. The projects cover a wide range of fashion, from shirts to bags to jewelry to shoes and a whole host of other items. There's even a bike helmet! And Stencil Style 101 knows that stencils have uses far ranging from just painting - the techniques presented include paint, sewing, embroidery, knitting, jeweling, felting, leatherworking, quilting, and more.
If fashion projects aren't your thing, Roth is also the other of a whole series of books on stenciling: Stencil 101 and Stencil 201, Stencil 101 Décor, and Stencil 101 Stationery.
The projects do require some knowledge of techniques and materials to do. I would rate this a "medium" level of difficulty for most projects. A few, like the knitting and quilting, require skill in a specific craft.
This is definitely not your mother's stencil book - the projects include stenciled motorcycle boots, a silk scarf with skulls on it, and a zebra print bangle bracelet. For young hipsters (or crafters looking to make gifts for young hipsters) the book is a great resource. Even if you aren't a fan of the book's specific designs, the techniques described can be used to create projects of your own design. For the project below, I took a technique from the book to make a t-shirt, but used a different stencil from the book than the one the book project I did was created with.
The stencils in Stencil Style 101 are a heavyweight paper, coated to make them resistant to liquid mediums like paint. The one I used for my project definitely has more use in it after being rinsed and wiped clean thoroughly.
I started out with an inexpensive Hanes Just My Size t-shirt that I got from my local Walmart. At about $5, it was cheap enough I could afford to mess it up if my project didn't go well! Some of the techniques are demonstrated in the book on leather bags and other expensive items. I got an anxiety attack just considering the possibility of doing something like that!
I chose a subway art style stencil with lots of international city names on it. I placed it deliberately crooked since I figured I would never get it straight (plus being curvy nothing looks straight on me). This way, it has an "I meant to do that" look instead of an "is that crooked?" look.
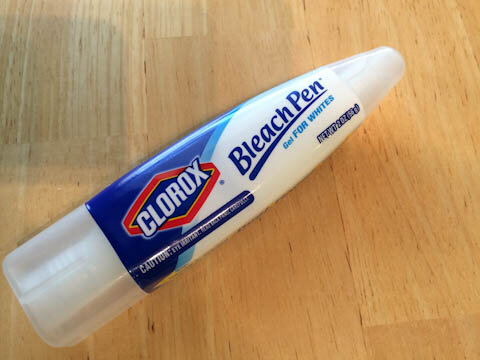
The technique I chose uses bleach to stencil with (page 17). The best source for this is a Clorox Bleach Pen. The bleach in the pen is a gel, so it will stay where you put it and go on more evenly, unlike liquid bleach. Before I started working with my bleach, I stuck my stencil down with nice wide blue painter's tape. This served two purposes - it kept the stencil in place, but it also increased the margins on the stencil to prevent the bleach bleeding off the edges while I worked.
I used a foam brush to apply the bleach gel from the pen, after squeezing it out onto a paper plate that I was using as a palette first. Safety Note: I was wearing latex gloves to protect from the chemicals! I mostly used the paintbrush to "dab" the bleach onto the stencil. Brushstrokes would have provided too many opportunities for the bleach to be pushed under the edge of the stencil. It's important to work quickly if you want your bleach effect to be even. In the photo below you can see that the bleach at the top of the stencil (the word "Paris") is starting to change the fabric's color already while I'm still applying the bleach to the bottom of the stencil design. When the bleach was all applied, I let it sit until I was happy with the color. Then it was off to rinse it in a bath of bleach stop. There's several options to use to stop bleach action - I chose Sodium Thiosulfate, which is sold as a photo processing fixer chemical but also serves dual purpose as a bleach stop (and will also get out iodine stains, and de-chlorinate water for use in your fish tank). It costs about $5 for a 1 pound bottle of crystals on Amazon, and I have plenty left over after doing my t-shirt for many more projects.
I got a bit messy with the bleach and so I ended up with a "distressed" look on my t-shirt, but I really like how it came out. It is now one of my favorite t-shirts! I can't wait to try more projects from this book - maybe next time it will be a tote! But I have to find the right one first (or maybe make it...hmmm...)
Stencil Style 101 by Ed Roth is currently available on Amazon in paperback for $20.45.


