Project | Using Project Life With Kids
We finish out Kids Crafts Week with the hottest thing to hit scrapbooking for grown-ups in the last few years...Project Life!
[Disclosure: This site is a participant in the Amazon.com affiliate program. Some links in this article are affiliate links that pay this site a commission when a purchase is made after a click.]
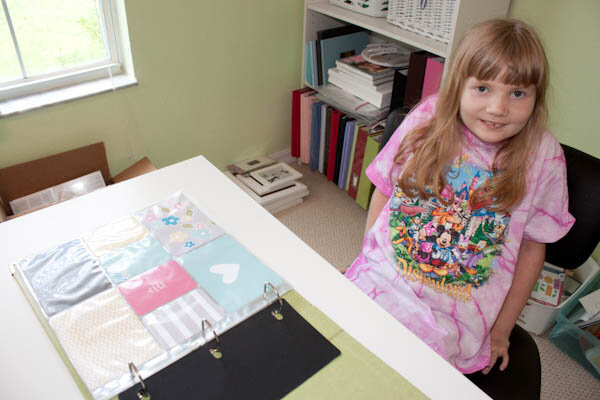
My 10 year old daughter, Bridget, recently decided that she wanted to "make a scrapbook too". Due to her limitations (she has arthritis and autism), I decided to try her out with Project Life as a "shortcut" to enabling her to scrapbook.
I let her browse the new Project Life releases online, and she went straight for the "Blush" kit, full of pink and doodle-y flowers. (A "Honey" kit just "accidentally" fell into Mommy's cart while the kid was picking out her kit....you'll hear more about that later!)
We picked a topic for her first Project Life pages, the day we spent at Disney's Animal Kingdom for her 10th birthday last month. Then we sat down at my computer and I opened up my Adobe Lightroom library. Bridget pointed to the pictures that she wanted and I took care of printing them the appropriate sizes.
Since we were just starting her album, we started by inserting the cards for the front and back pages. It gave her a chance to try out working with the pockets. I was pleasantly surprised at how fast she picked up the concept of having to insert the cards from the backside to do the reverse of the pages. We're working with the Project Life Design A page protectors, and a We R Memory Keepers Classic Leather Album in Kiwi.
Bridget was so proud of her completed front and back pages! For now, we just put the cards in place as an exercise. Later, we'll go back and decorate them some and create a title and everything.
First, I had her insert all of her photos into pockets. Because she had so many, we inserted an extra protector in the middle of the layout - a Design G protector that holds two vertical and two horizontal photos along with two 3x4 slots.
Next I had her create a title card for the Animal Kingdom spread. She picked out a background card for it and then I offered her a selection of letter stickers for the title. She went (predictably for a 10 year old girl!) for the glittery aqua ones - Amy Tangerine "Scene" Foam Thickers in Cascade Glitter.
Then I had her fill in, one by one, the other empty slots that remained in the page protectors by selecting cards from the kit and putting them in the slots. She wrote journaling on a 4x6 grid card, and did a bit of minor decorating on a few other cards. The journaling was a sneaky mommy way of getting her to practice her writing during vacation, and is one of the reasons I'm encouraging her to do this project this summer.
One card she stamped to show that we were celebrating her birthday that day - she did really well using the little mini pigment ink pads from Close To My Heart with a small rubber stamp. The tiny stamp pad was a very usable size for her small fingers!
And here is the result! She loves her scrapbook pages! They were a great activity for us to do together. Beyond the fun, they had some educational value in practicing her writing and her motor skills.
Here's a closer look at the finished product:
Supplies | We R Memory Keepers Classic Leather Album (Kiwi), Project Life Page Protectors (Design A), Project Life Page Protectors (Design G), Project Life Core Kit (Blush), American Crafts Amy Tangerine "Scene" Foam Thickers (Cascade Glitter), BasicGrey Nook & Pantry 6x6 paper pad, My Mind's Eye "My Girl" 6X6 paper pad, My Mind's Eye "Happy Day" 6x6 paper pad, Heidi Swapp epoxy word stickers, Close To My Heart pigment ink (sky), Stampin' Up! stamp set.
I was concerned when we started this that it would be over my daughter's head but she did really well and loved it and is already excited to make her next page! Something tells me that this won't be her last Project Life kit...this is a great kid project!


